Build a Professional Business Website with Hello Biz in Minutes

Is it possible to create a business website in minutes? With the Hello Biz theme and Elementor’s intuitive editor, you can launch a polished, conversion-ready website in minutes—even with zero design experience. This step-by-step guide (plus a full video tutorial!) shows you how to go from the business idea to a beautiful business site, with designer-made templates, easy customizations, and built-in tools to help your site grow as you do.

Creating a business website can feel overwhelming—especially if you’re new to web design. But what if you could build a fully functional, professional website in just a few minutes?

With Hello Biz, a free WordPress theme, and Elementor, you can quickly create a conversion-focused website that looks professional and is ready to scale as your business grows.

In this guide, we’ll walk you through the entire process step by step. Plus, you can watch our video tutorial (embedded below) for a real-time demonstration!

Why Use Hello Biz & Elementor for Your Business Website?

Before we dive in, let’s talk about why Hello Biz and Elementor are the ultimate power duo for building a business website:

✅ Hello Biz is a free WordPress theme designed for business websites, providing a guided setup wizard, professionally designed templates, and built-in Elementor widgets.
✅ Elementor’s drag-and-drop editor makes website creation intuitive—no coding required.
✅ You get full creative control with global styles, advanced customization, and a library of ready-to-use templates.

Now, let’s start building your business website! 🎉


Step 1: Installing Hello Biz & Setting Up Your Website

To get started:

1️⃣ Install Hello Biz: From your WordPress dashboard, go to Appearance > Themes > Add New, search for Hello Biz, then Install & Activate.

2️⃣ Launch the Setup Wizard: The Hello Biz onboarding wizard will guide you through choosing a template and setting up essential elements.

3️⃣ Select a Pre-Built Template: The template library offers professionally designed layouts for different types of  businesses (e.g. consultants, photographers, agencies, restaurants, etc.).

4️⃣ Apply the Template: You may need to connect your Elementor account to access the template library. Once connected, click Apply All to import the design.

5️⃣ Personalize the Template: Change the site name, upload your logo and set your brand colors and typography right from the Home Screen of Hello Biz


Step 2: Customizing Your Website

Once your template is applied, it’s time to personalize the content to match your brand.

1. Setting Up the Homepage

Your homepage is the first impression visitors get of your business. Here’s how to customize it:

🔹 Update the Hero Section (main banner):

  • Change the layout using the visual presets.
  • Modify the intro text, heading, and subheading.
  • Add or edit the primary call-to-action button (CTA).
  • Adjust the hero image.

🔹 Use Global Colors & Fonts

  • Click the globe icon to select predefined colors (instead of manually styling each element separately).
  • Use Global Fonts for a consistent brand identity.

🔹 Personalize Specialization & Services Sections

  • Replace default text and images with your own business services.
  • Update the titles and descriptions to reflect your offerings.

🔹 Testimonial Section

  • Modify the client names and testimonials.
  • Keep the 5-star rating to showcase customer satisfaction.

🔹 Call-to-Action (CTA) Section

  • Select a layout from visual layout presets.
  • Update the CTA heading, description, and button text.
  • Style it to match your brand identity.

Once done, publish your changes! 🎉

Step 3: Editing Core Pages (Services, About, & Contact)

2. Customizing the Services Page

Your Services page helps visitors understand what you offer.

✔ Update the Hero Section (layout, heading, description, and image).
✔ Edit the Cascading Services Section using the ZigZag Widget (ideal for service descriptions).
✔ Remove unnecessary testimonial sections (if already present on the homepage).
✔ Ensure CTA buttons link correctly to relevant pages.

3. Customizing the About Page

The About page shares your story and builds trust with potential customers.

✔ Update the hero section and text editor widget.
✔ Add personal details, business values, or a team introduction.
✔ Reuse the CTA section to maintain design consistency.

4. Setting Up the Contact Page

Contact page ensures potential clients can easily get in touch.

✔ Customize the Contact Form (modify fields to match your business needs).
✔ Enable email submissions (so form responses go to your inbox).
✔ Set up a Thank You Page for post-submission confirmation.
✔ Add contact details in the contact widget (email, phone, address, map view) to improve credibility.

Once done, publish and test your form. ✅

5. Updating the Header

Your website header includes the navigation menu, logo, and CTA button.

✔ Adjust the layout and add the logo or site name based on your preference.
✔ Update the navigation menu if necessary.
✔ Modify the CTA button text and phone number.
✔ Use the Advanced Tab to enable sticky headers, floating effects or changing backgrounds on scroll.

The footer provides important business information:

✔ Add a short business description.
✔ Update social media links (replace placeholder handles).
✔ Modify the contact column (email, phone, address).
✔ Adjust typography styles for better readability.

Once satisfied, publish your changes. 🎉

Step 5: Ensuring Mobile Responsiveness

Every professional website should be mobile-friendly. Luckily, Hello Biz templates are fully responsive!

✔ Perform a final mobile check using Elementor’s Responsive Mode.
✔ Adjust any design inconsistencies if needed.
✔ Preview your site on different screen sizes before launching.

Bonus: Upgrading to Elementor Pro

As your business grows, you may need more advanced features. Elementor Pro unlocks:

✅ Form Submissions Dashboard –Collect and manage all form entries in one place.
✅ Pro Widgets – Use pricing tables, testimonials, countdowns, and other high-converting elements.
✅ Popups – Capture leads, promote offers, and grow your email list.
✅ Theme Builder – Create a custom blog layout for better SEO and branding.

Want to take your website to the next level? Consider upgrading to Elementor Pro for these exclusive features. 🚀

Pro Tips Elementor

Pro Tips Elementor

  1. Use Global Settings
    Define your site’s typography and color schemes globally. This makes it easier to maintain design consistency and speeds up the build process.
  2. Try the New Flexbox Containers
    Elementor has introduced Flexbox for layout building, replacing older section/column structures. This offers greater control and performance. Enable it via Settings > Features > Flexbox Container.
  3. Leverage Revision History
    Made a mistake? Use the History panel to undo/redo changes or restore earlier versions of your page.
  4. Optimize Page Load Speed
    • Avoid too many widgets per page
    • Compress images
    • Use lightweight templates
    • Consider a cache plugin like WP Rocket or LiteSpeed Cache
  5. Use Role Manager
    Limit Elementor access for contributors or clients by setting role-based editing permissions. Helps prevent accidental changes to core layout.
  6. Learn from Elementor Academy
    Elementor’s own academy offers free tutorials on building sales pages, ecommerce sites, landing pages, and even full funnels.

🤖 Elementor AI – Your Secret Design Assistant

Since early 2024, Elementor has integrated AI tools into its Pro version. Here’s how you can use them:

  • AI Content Generator: Write SEO-optimized text (headings, descriptions, buttons) inside the editor.
  • AI CSS Generator: Ask AI to generate custom CSS snippets.
  • AI Code Helper: Useful for dynamic content like loop queries, custom conditionals, etc.

Example Prompt in AI panel:

“Write a CTA button text for a fitness coaching program with urgency”

👉 Output: “Start Your Transformation Now – Only 5 Spots Left!”

This dramatically reduces the time you spend on copywriting or coding.


✅ Final Verdict – Should You Use Elementor?

Elementor is an incredibly powerful WordPress page builder with both simplicity for beginners and depth for professionals. Here’s the final recap:

Category Score (out of 5)
Ease of Use ⭐⭐⭐⭐⭐
Design Flexibility ⭐⭐⭐⭐⭐
Speed Optimization ⭐⭐⭐⭐☆
AI & Innovation ⭐⭐⭐⭐☆
Customer Support ⭐⭐⭐⭐☆
Value for Money ⭐⭐⭐⭐⭐

Who should use Elementor?

  • Bloggers, freelancers, small businesses
  • Marketing teams needing fast landing pages
  • Ecommerce owners using WooCommerce
  • Agencies building multiple client sites

Who might not need it?

  • Hardcore developers preferring custom code
  • Users with very basic website needs (use native WordPress block editor)

💰 Pricing Overview

Plan Price/year (USD) Sites
Free $0 1 site
Essential $59 1 site
Advanced $99 3 sites
Expert $199 25 sites
Agency $399 1000 sites

All Pro plans include Theme Builder, Popup Builder, WooCommerce Builder, and AI.


🎁 Bonus Offer

If you purchase Elementor Pro via my link, you’ll get my exclusive bonus bundle for free:

  • 🔧 5 Pre-built Elementor Landing Page Templates (ZIP)
  • 📘 “Top 50 Elementor Tips” eBook
  • 🎥 Video tutorial: “How to Build a Funnel with Elementor Pro + AI”

New Features That Put You in Control

Discover the latest features in Ally, Elementor’s new web accessibility plugin for WordPress. From customizable icons to dynamic triggers in Elementor and Gutenberg, Ally now gives you even more control over how accessibility fits your site and workflow.

Web accessibility can feel complicated—but Ally is built to make it simple. With the latest updates in versions 3.2.0 and 3.3.0, you now have even more control over how Ally fits into your workflow and your site’s design. Whether you use Elementor, Gutenberg, or another WordPress setup, these improvements make it easier to integrate, customize, and manage accessibility—without workarounds or added friction.

Here’s what’s new:

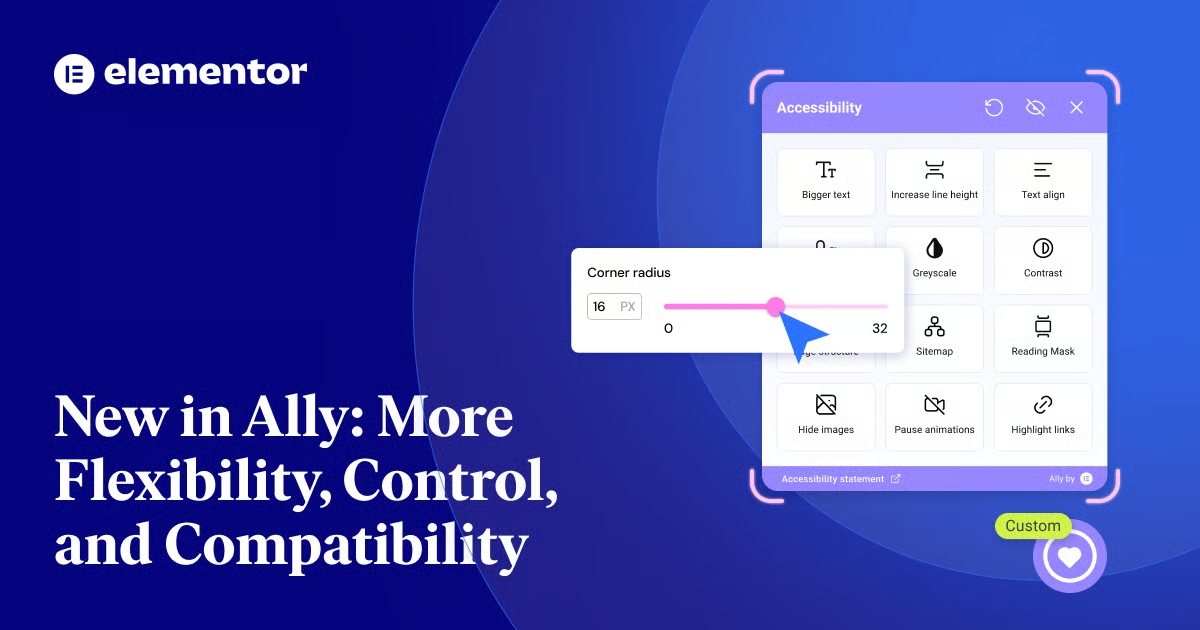
1. Customize Your Widget’s Corner Radius

Your website’s look matters, and so does consistency. With this update, you can now adjust the corner radius of Ally’s usability widget so it blends more seamlessly into your site’s design—whether you prefer sharp edges or fully rounded corners.

Why it matters: This small but powerful setting helps align the Ally widget with your branding for a more polished user experience. It was also one of the most requested features from our users—so we made it happen.

Make your site more accessible with Ally.

2. Flexible Widget Activation, Wherever You Build

In Elementor: Use a Dynamic Tag to trigger the Ally’s usability widget

Using Elementor? You can now use a Dynamic Tag to trigger the Ally widget from any link on your page—button, menu, icon, and more.

Why it matters: This gives Elementor users full control to trigger Ally’s usability widget from any link—making it easier to integrate accessibility into your site’s user flow, without relying on the default widget icon.

In Gutenberg: Use a custom block to trigger Ally from any link on your page or post.

Why it matters: This update makes Ally even more inclusive), expanding full functionality to users who rely on the native WordPress editor.

Not using Elementor? No problem. We’ve added a new Gutenberg block that allows you to trigger Ally from any custom link on your page or post.

Make your site more accessible with Ally.


3. Add Your Own Custom Accessibility Icon (SVG)

Ally now supports custom SVG icons, letting you replace the default accessibility widget icon with one that better fits your brand or user needs.

Why it matters: Whether you want a softer design, a culturally specific symbol, or your own branded accessibility icon, this new feature gives you full control.

Try the New Features in Ally

With these updates, Ally becomes more adaptable to different design systems and builder environments, helping you create more accessible websites without compromising on branding or usability.

If you’ve already installed Ally, just update to the latest version to explore all these new features. Not using Ally yet? Now’s a great time to get started and take the first step toward a more accessible site.

With every update, Ally gets closer to making accessibility easier for everyone. Try the latest version and start making your website more inclusive to all.

Built with Google Cloud, Elementor Host empowers professional web creators to deliver fast sites at scale

For web creators, performance isn’t just nice-to-have – it’s the heart of the product. That’s why agencies and professionals who build sites for clients are turning to Elementor Host. Built with Google Cloud, Elementor Host delivers websites that are not only beautiful, but fast, scalable, and reliable. The result? Better client satisfaction, stronger performance metrics, and more repeat business

Why Site Performance Matters for Your Clients

Website performance plays a critical role in how users experience a site – and how well that site performs in search rankingsengagement, and conversions. For agencies and professionals delivering sites to clients, performance is not just technical – it’s part of the business value you offer.

While performance is often equated with “speed,” the industry has evolved to assess it through a broader, user-centric lens. Google’s Core Web Vitals are now widely adopted as the standard for real-world web performance. They focus on:

  • Loading speed – Largest Contentful Paint (LCP): Measures the time it takes for the largest visible element on the page to render.
    → LCP under 2.5 seconds is considered good.
  • Interactivity – First Input Delay (FID): Measures the delay between a user interaction (like a click) and the browser’s response.
    → FID under 100ms is considered good.
  • Visual stability – Cumulative Layout Shift (CLS): Measures how much the layout shifts unexpectedly as the page loads.
    → CLS under 0.1 is considered good.

Elementor Host outperforms major WordPress hosting providers when it comes to real-world performance. As of April 2025, 60% of Elementor-hosted websites achieved “Good” Core Web Vitals scores, ranking #1 across all measured WordPress hosts in the independent Core Web Vitals report.

In addition, another critical metric is Time to First Byte (TTFB): The time it takes for a browser to receive the first byte of page content from the server. It directly affects perceived speed and SEO performanceElementor Host, powered by Google Cloud’s compute-optimized C2 machines, reduced average TTFB by 72%.

For agencies, this means:

  • Faster-loading websites that improve user experience and reduce bounce rates
  • Better SEO outcomes through stronger technical performance
  • Fewer client escalations due to lag or downtime

The Google Cloud Advantage: Speed, Scale, and reliability

Focusing on performance, Elementor Host was built on Google Cloud’s infrastructure from day 1, which gives agencies an edge when it comes to delivering reliable, high-performance sites for clients.

  • Auto-scaling built in: Using Google Kubernetes Engine (GKE) and Infrastructure as Code, Elementor Host adjusts to traffic surges automatically – no manual upgrades or downtime worries.
  • Blazing-fast loading times: Leveraging compute-optimized C2 machines, we reduced Time To First Byte (TTFB) by 72%, improving user experience and SEO across the board.
  • Reliability and security: With enterprise-grade infrastructure from Google Cloud, your clients’ businesses are always protected.

Find the best Elementor Host plan for you

No matter what your project’s scope, Elementor Host has a plan that fits. Each plan includes:

  • Auto-scaling hosting infrastructure – adjusts resources dynamically during traffic spikes
  • Cloudflare Enterprise CDN – with over 320 global edge locations for faster delivery
  • 24/7 expert support – ready to help when you need it most
  • Free professional site migration – Easily migrate your existing site

Elementor Host gives you the performance of a modern cloud architecture with the ease of a tool purpose-built for web creators.

Elementor Review: Unleashing Creativity in WordPress Design

Elementor, the popular WordPress plugin, has revolutionized the way designers and developers create websites. Renowned for its intuitive drag-and-drop interface and robust feature set, Elementor empowers users to craft visually stunning websites without writing a single line of code. In this review, we delve into the key features and functionalities that make Elementor a game-changer in the world of web design.

User Interface: At the heart of Elementor lies its user-friendly interface, which allows users of all skill levels to design websites with ease. The intuitive drag-and-drop editor enables seamless customization, enabling users to effortlessly add, remove, or rearrange elements on their pages. With real-time editing capabilities, users can see their changes instantly, providing a truly interactive design experience.

Feature Set: Elementor boasts an impressive array of features that cater to the diverse needs of web designers. From a vast library of pre-designed templates and blocks to advanced styling options and animations, Elementor offers unparalleled flexibility and customization possibilities. Additionally, the plugin is fully compatible with popular WordPress themes and plugins, ensuring seamless integration into any website

Performance: One of Elementor’s standout qualities is its commitment to performance optimization. With its lean codebase and efficient rendering engine, Elementor ensures fast loading times and smooth user experiences. Furthermore, the plugin’s responsive design capabilities enable websites to look and function flawlessly across all devices, from desktops to smartphones.

Community and Support: Elementor boasts a thriving community of designers, developers, and enthusiasts who contribute to its growth and development. With an active support forum, extensive documentation, and regular updates, Elementor ensures that users have access to the resources they need to succeed. Whether seeking advice, troubleshooting issues, or sharing ideas, the Elementor community is a valuable asset to users worldwide.

Conclusion: In conclusion, Elementor stands as a testament to the power of innovation in web design. With its intuitive interface, robust feature set, and commitment to performance, Elementor empowers users to unleash their creativity and bring their vision to life. Whether building personal blogs, business websites, or e-commerce stores, Elementor offers the tools and resources needed to succeed in the ever-evolving digital landscape.

How to setup elementor form

Setting up a contact form with Elementor is a straightforward process that allows you to create customized forms to suit your needs. Follow these steps to set up a contact form using Elementor:

  1. Install Elementor: If you haven’t already, install and activate the Elementor plugin on your WordPress website. You can find Elementor in the WordPress plugin repository or by searching for it in the “Plugins” section of your WordPress dashboard.
  2. Create a New Page or Edit an Existing One: Navigate to the page where you want to add the contact form. You can create a new page or edit an existing one using Elementor.
  3. Add a Form Widget: In the Elementor editor, search for the “Form” widget in the left sidebar. Drag and drop the Form widget onto the page where you want the contact form to appear.
  4. Customize the Form Fields: Once the Form widget is added to your page, you can customize the form fields according to your requirements. Click on the form fields to edit them and add or remove fields as needed.
  5. Configure Form Settings: Click on the form widget to access its settings. Here, you can configure various options such as email notifications, success messages, and more. Make sure to set up the form to send submissions to the appropriate email address.
  6. Style the Form: Use Elementor’s styling options to customize the appearance of your form. You can change the colors, fonts, spacing, and other design elements to match your website’s aesthetic.
  7. Preview and Publish: Once you’re satisfied with the form’s design and settings, preview the page to see how the form will look to your visitors. If everything looks good, click the “Publish” button to make your changes live on your website.
  8. Test the Form: Before making the form available to visitors, it’s essential to test it to ensure that it functions correctly. Fill out the form and submit a test submission to verify that you receive the email notification and that the form submissions are recorded properly.
  9. Add the Form to Your Menu or Sidebar (Optional): If you want to make the contact form easily accessible to visitors, consider adding a link to it in your website’s menu or sidebar.

By following these steps, you can set up a contact form using Elementor quickly and easily, allowing you to engage with your website visitors and collect valuable information from them.

Elementor input box

To customize the placeholder text in the search field using the JetSearch plugin for Elementor, you can follow these steps:

Install and Activate JetSearch Plugin: If you haven’t already, install and activate the JetSearch plugin on your WordPress website. You can find JetSearch in the WordPress plugin repository or by searching for it in the “Plugins” section of your WordPress dashboard.
Edit the Search Widget: Go to the page where you have added the JetSearch widget using Elementor. Open the Elementor editor and locate the JetSearch widget on the page.
Access JetSearch Settings: Click on the JetSearch widget to access its settings panel. Look for the option that allows you to customize the placeholder text for the search field.
Customize Placeholder Text: In the settings panel, you should find an option labeled “Placeholder” or “Placeholder Text.” Click on this option to edit the placeholder text for the search field.
Enter Custom Placeholder Text: Enter the custom placeholder text that you want to display in the search field. This text will provide guidance or instructions to users about what they can search for in the field.
Save Changes: After entering the custom placeholder text, make sure to save your changes to apply the new placeholder text to the search field.
Preview and Publish: Preview the page to see how the search field with the custom placeholder text looks. If everything looks good, click the “Publish” button to make your changes live on your website.
By following these steps, you can customize the placeholder text in the search field using the JetSearch plugin for Elementor, allowing you to provide clear instructions or guidance to users when they interact with the search feature on your website.